Tuesday, May 31, 2011

Day 34... Things keep getting in My Way... Jobs

I have not cast the special pottery piece yet... maybe next week.  I think it would be great to have no job, no outside job that is.  I would stay home and weed the gardens, pick off and put asparagus beetles into the "Jar of Death", visit with friends, take naps, cook out on the fire pit, weave, read and watch the grass grow.

The only job my grandfather ever had was here on the farm. Farming is busy and hard work, long hours and dirty. But it is also rewarding. Grampa liked Sunday drives. On Sunday, in the afternoons, when we didn't go fishing with Dad, we would go on  joy rides.  My grampa had bought a brand new Rambler station wagon in 1960. He paid about $2,000 for this beautiful blue wagon with white top. He kept plastic seat covers on it.  It still smelled new in 1971 when he died and left the car to my mom. We drove it for awhile before it died and Stewards Auto Parts in New Hartford CT has it now. It is still on his lot. 

My dad was an automobile mechanic, so we had used cars. Only once got a new car. In 1961 we bought a new Corvair!

Grampa would take us all to Brooklyn NY once in a while to visit the relatives. He was born in Brooklyn in 1889 to German immigrant parents.  He raised chickens, cows, grew flowers and vegetables. He bought the new Rambler to cart around plants, and us kids.

Before him, Alpha Davis, a renter, worked as machinist at the Torrington Brass Company. Back when a family man could have a job, a house, raise children on a factory salary and his wife could stay home and take care of the kids and house. They had a set of twins. Reginald and Winthop were born in 1904.  Ten years later, Alpha moved to Fairfield CT where he was still a machinist at a factory and his wife was still unemployed.

Not to say factory work was great. It's not for me. I packaged syringes at a factor at 19 and though I would die of boredom.

In 1880, Martha Birge, the surviving daughter of Nathaniel, was keeping house for her father here. He was 71, and I don't know how much farming he was doing. He was the first recorded owner of the house and was a "joiner" on the 1850 and 1860 census. A joiner was a man who made mortise and tendon joints for boxes, drawers and such. My property then was valued at $1,500. Ten years later, the census had Nat down as a farmer and the property had jumped to $2,000.

Before Nat was his father, Simeon.  I don't know what Simeon did for a living. In the 1850 census, Nat was the only person on this side of the highway who was listed as anything other than Joiner.  The rest were farmers. Simeon had fought with his brother in the Revolutionary War. I assume he was farming in between wandering around fighting the British.

Through all this, the women would be "keeping house". I would have like to be my "house keeper". As it is, I have to run around doing odd jobs to fill in gaps in the pottery business. I hope to get the special pot done this coming month if I am not pulled into too many directions. I do hope so.


Want me to send you an email notice of my next post?  Sign up right here:
Subscribe to I saved a homestead by Email

Thursday, May 26, 2011

Day 29.... In the Busyness Business

 I have not made a cast of my special project... yet.  Seems like there is always too much to do. Taught a bunch of great kids from age 4 to 16 at White Memorial Nature Center yesterday. After what, 12 days of clouds and rain, I did not realize is would be sunny and hot so I got my first sunburn working with the kids on the potters wheel on the lawn.  Then went to water a friends greenhouse plants till 7:30... there is never enough time in 24 hours. Each day should have 48 hours. You could work, take a nap, have fun around the house and yard, take a nap, visit friends and then go to sleep for another 8 hours... or would that really work?


Phyllis 1938

I remember momma. She was a busy person. My mom lived here from 3 days old till she was 37 years old. Thirty seven seems so young to me now.  Her parents, Frank and Irene, were married in the living room here. They were both in their late 30s, Frank had been in WWI and never married and Irene's first husband had died in his 20s. Frank and Irenes tumulus marriage did not last long, and somehow, grampa Frank got custody of little Phyllis. My momma Phyllis, grew up here with housekeepers and helped with the cows, chickens and greenhouses.  She loved plants and animals. She wanted to be a professional ice skater. She rode horses, went swimming a lot, skated and went skiing. She had pen pals, a favorite in New Zealand. She collected movie star photographs. She got a Brownie camera and took lots of photos of her cats and her favorite dog, Tippy.  So I now have photos of this house, Tippy, vacations she went on, her friends and lots of  letters.  In the "old" days before computers, people wrote more letters. They sent postcards. I have a hugh collection of her postcards, ones she received and ones she bought as souvenirs.

She met my dad in 1946. She was sixteen and wrote to her mom in New Hampshire, how she had met "Richie". He gave her a box of candy in a yellow and lilac flocked container that she kept all her life. Richie was an automobile mechanic. They moved here to the farm for a couple of years and my brother was born, then they moved out and I was born, then they moved back four years later. Richie and grampa re-muddled the barn then. Dad wanted to repair cars and so they gutted the old barn throwing out the cow stanchions and probably a lot of good old stuff. Mom helped in the greenhouses and the garden. We had a hugh garden. Mom did a lot of canning. We rarely bought vegetables from the store.  I am a little embarrassed to say I still have a couple of her canned beans down in the cellar. In an old house, things get pushed back into cupboards and priorities shift. Someday I may throw those beans out.

My sister came along six years after me. Mom took us all on day trips. My brother was a Cub Scout and Mom was the leader. I went along as the team mascot. We took trips to the Hershey's Peter Paul candy factory, http://naugatuck.patch.com/articles/the-demolition-of-peter-paul#photo-5022211 the Pez factory, http://www.pez.com/, Mount Tom, Mohawk Mountain. So many day trips.

My dad loved fishing. We would go all over CT, MA and NY fishing and mom would bring her embroidery or knitting. She was still working on embroidering quilt squares... "The State Flowers" when she died.  She kept the embrodery floss in a woven sweet grass basket from Maine. Now I have to try, or perhaps my daughters will, to finish it... someday. She also knitted tiny Barbie clothes for our dollies.

She was a very good cook. We came home from school everyday to homemade cake and cookie snacks. Stuffed peppers, Rabbit Cacciatore, Beef tongue, Beef roasts and Tuna-noodle casseroles for supper. We ate really well. She made us fresh squeezed lemon aid and our homemade cider. We also drank a lot of Kool aid.  Running a house, taking care of three children and two men, weeding, canning, day trips and cooking, kept her very busy.

I have tried to follow in her footsteps. Only instead of the greenhouse, I work in the pottery barn. It is a very busy lifestyle. Running a house, taking care of children, weeding, day trips and cooking have kept me busy too. I would have liked to do more at home stuff. I would have liked to stay home and cook and clean.
I think my mom enjoyed it all.  Keeping busy and puttering around at a variety of things, meeting new people and hanging out with friends and relatives is what makes our lives so good.

And so, I am off to the barn. Like my mom, I get to work by walking out our back door onto the old stone steps across the driveway and lawn. Her to the greenhouses which are gone now, and me to the barn... re muddled but still standing.


Want me to send you an email notice of my next post?  Sign up right here:
Subscribe to I saved a homestead by Email

Tuesday, May 24, 2011

Day 27... Diversify and Adapt...

The special pot is out of the kiln and I have sprayed it with a can of varnish to fill in the porous clay. In the old days, I would have used soap, Murphy's oil soap works good. This would be absorbed into the fine holes of the fired clay. If I do not seal the pin holes, when I pour plaster over the mold, the plaster will also soak into the fine holes of the model and I will not be able to separate the model from the mold. So I use a "release" such as spray varnish or oil soap.


Norwich CT pottery and beehive kiln
 I have been making pottery since 1970. In 1986, I was inspired by my moms old yellow ware bowls to try to make some myself.  I had grown up in this house making cookie and cake batter in these bowls. My girls were 1 and 3 years old when my sister and I went on a road trip to Ohio to research the production and lives of potters in the 1800s. Liverpool, Ohio was the center of yellow ware production in the 1800s.  Thousands of pots were cranked out for years. Every home had a yellow ware bowl.  Many people also used the pie pans, blanc mange molds and colanders that were very necessary in the kitchen. Yellow ware was not widely used for dinner ware. Paupers used simple red ware porringers and mugs and ate off of wood tureens... http://www.rogerabrahamson.com/... Tradesmen, shop owners and the wealthy used fine china.. earthen ware and porcelain imported from Europe. Yellow ware was mostly a kitchen tool.

Potters have secrets. Like most tradesmen, they were in competition with others to make money to survive. When they stumbled upon a good decorating or firing method, they tried to keep it to themselves. Very few notes were made on clays, glaze recipes and firing procedures.  There were no books on "Yellow ware for dummies". I had to experiment.  My first pots were quite ugly, but I had to start somewhere. The clays came out too pinkish or too tan. Glazes were cloudy or crazed. The wonderful feathering disappeared when fired. Colored bands fell off the pots as they dried.

I persisted and finally found out the best clays for the yellow color, temperatures to fire, and glazes to fit properly. It is still an uncertain task.  The clay I get now is from Missouri.  It is shaft mined, and as they mine out deeper and deeper into the earth, each 2000 pound batch I get every year has changed a little. I have to readjust my temperatures. The recent batch has much more grit to it and I find that extremely annoying as I had to adjust the glaze thickness to cover the roughness of the fired pots.

Back in the later 1980s, I went to trade shows and sold my reproductions to museum gift shops or antique and country stores. Places were folks that wanted the country look could buy yellow ware that was much less expensive than the antiques.  Old yellow ware was the Tupperware of the day, it was carelessly used and tossed around. Earthen ware is not as durable as stoneware and many pieces cracked and broke. So today, though thousands were cranked out by those early factories in Ohio, Pennsylvania, Connecticut, New Jersey, New York.. ok, most of New England and Midwest were making some form of yellow ware by the 1880s, many of the pots were broken, chipped and thrown out. The market in the 1980s also wanted lead free pots they could use and save their antiques for posterity, which is a good thing.

I cranked out thousands of pieces of pots for a few years before the market started slipping away. Shop owners were not selling and they wanted to see the pots to buy rather than place the large orders I depended on.  Traveling expenses went up.. gas, hotels, food.. I stopped traveling and started camping out.

Then a friend set me up with the Goshen Fair.  This was my first paying demonstration. I have set up for ten years now in the Antique Barn near the entrance every Labor Day weekend. I get to talk to people about pottery, show them how it is made, talk about Hervey Brooks the famous potter that had an 1800s shop two miles down from the fair grounds, hang out with farmers and craftspeople and make money doing it.

Next came the Big E. Another friend suggested I call Dennis Piccard at Storrowton Village in Springfield MA. Now, every year, I demonstrate with my wooden treadle wheel, in 1800s clothing at this great little spot of Heaven at the Big E every September.  http://www.thebige.com/sv/

I now demonstrate all over New England and this will be my first year at the South Carolina State Fair. Great! However, fairs are only running for four or five months in the summer and fall.  In the off months, I teach after school classes, museum workshops and at my home.  My pottery list has moved into some red ware, stoneware face jugs and casting figure bottles and sundries.  I make clay marbles and tiles too. Diversify. 

I also fill in with working at greenhouses. I have woven some planters, birdhouses and little red cardinals for garden color into my stock of pots. 

I still love yellow ware though. I am making more one-of-a-kind special pitchers and steins that show off the beauty of this style of pottery. But I also have to change with the times to accommodate more customers.

When my grampa came from Brooklyn to start his own greenhouse here, he built one greenhouse to grow chrysanthemums and ship them back down to New York by train.  Originally he and his brother raised homing pigeons, chickens and a few dairy cows. Times may have changed for him, because he gave up on chickens and cows, expanded and started growing geraniums and petunias for cemetery boxes, which seemed to be a thriving business in the 60s. He also grew strawberry, tomato and pepper plants for gardeners. He stopped shipping flowers to New York.

Our local Indians once populated and hunted game on this ground. There was a wigwam 1/4 mile from this house when the first English settlers moved in from Windsor CT in 1744.  They cut down all the trees where the Indians had hunted. Killed or scared away a lot of the wild critters. Moved in cows and chickens. Plowed up the land and piled rocks for stone wall barriers. Then mills moved in and roads improved so locals started buying goods from farther away instead of from each other. Growing flax was not profitable when large mills in Massachusetts started turning out yards of cheap cotton. A few of our large dairy farms survived into the 1960s. Then car dealerships sprawled across the east-west highway as horses and oxen became a thing of the past.  McDonalds put the small hot-dog stand out of business. The old Applehouse has been replaced by a conveince mart. Walmart, Petco and Price Chopper moved on top of the cemetery in the middle of a cow pasture.

All along the way, people had to change and diversify. They had to adapt to changes and life styles in order to make a living. That is what I am trying to do too. So this special pot I am making will be mold cast. I am setting aside my love for turning yellow ware to try to pay off my tax bill!

Want me to send you an email notice of my next post?  Sign up right here:
Subscribe to I saved a homestead by Email

Monday, May 23, 2011

Day 26... Surprising developments


The special project did not explode in the kiln! Ok, so after 30 years of runing kilns, I know enough to avoid explosions, but with pottery, you just never know.  Once, I had a load of pots, over $1000 worth of yellow ware, and the tiny cone bar in my sitter was too close to the tube assembly and when the cone started to melt it attached itself to the assembly resulting in the switch not flipping off. Well, the kiln was on way too long, you can tell by the color of the heat after a while. You know that it is taking too long to fire, so you check the peephole and say... "Oh my God!", (and that is a prayer),  its overfiring!  There is nothing you can do except shut off the kiln, pray and wait another 8 hours or so to see what the damage is.


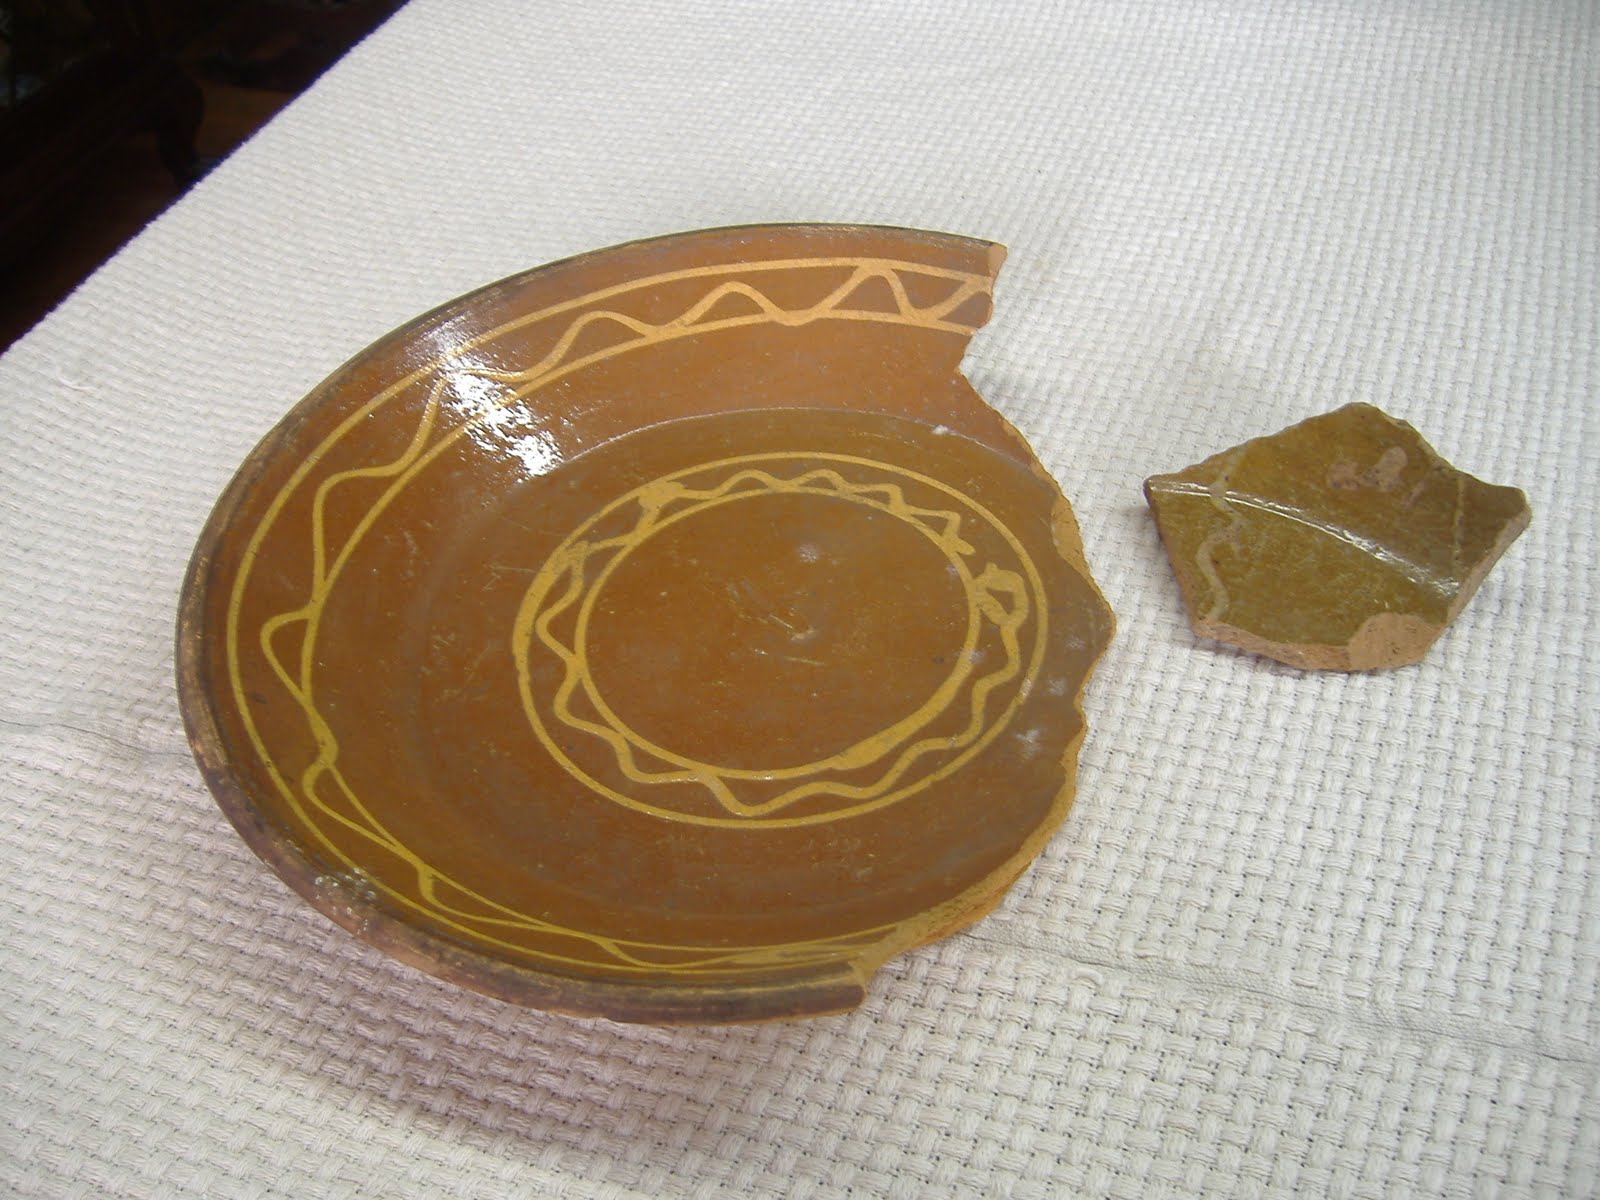
In this instance, the clay color had darkened to a lovely Guilden's mustard brown with little iron flecks. I use a clear glaze on my yellow ware and it is applied unusually thin, so none of the glaze ran down and stuck the pot to the kiln shelves. (Thank you God), but in over firing, my mocha tobacco tea designs, the pretty feathering patterns, the fine cobalt lines start to disappear and the white clay background melts into the pot. What you get is not Yellow ware, but some mutant form of pottery that would be ok in the art world of pots, but not ok in the authentic reproduction world of true yellow ware.

I threw most of them in the garbage can. Therapists say it is good to throw things when you are holding inner anger and need to get it out. I took a deep sigh, and threw each one into a metal trash can. The shattering and thuds were somehow satisfying and I went over to the wheel and started replacing the ones in the garbage can by making new ones.


My frog houses... two upset to take photos of theirs.
 Recently, I over fired in the same way, my 2nd time in 30 years, a load of kids pots. I especially hate ruining students pottery. Twenty two kids had made lovely frog houses. We coiled clay on the outside of upturned bowls, added house decorations, windows, doors, chimneys, vines, and 21 grammar school children made frog sculptures on top of their houses. I was impressed. Children are so uninhibited when it comes to art.  You show them what to do and let them go with it. Each frog house was an individual masterpiece!  Here is a photo of mine, that I had previously fired correctly. They were to be a lovely shade of bright green as kids like bright colors. The over firing caused the glaze to run down the pots onto the shelves and darken the glaze to olive green. I had to chip them off with a hammer and chisel and then spent hours filing down sharp edges. Glaze is just a coating of glass, so I had to be careful to get sharp fragments off or the children would cut their fingers.  Six broke. I glued 4 back together. Two had stilts stuck to the bottoms permanently. Two were in small fragments.

I was so disappointed. I wrapped them all up and returned them to the school. I anxiously awaited the children and got them together to tell them what happened. I had brought two coupons for the students whose pottery could not be fixed, "Is it mine?" Hunter asked. "Did mine break?" asked Rachel. When the two were notified, the little boy said. "Cool."

Kids are so resilient and take the outcome of there pottery projects in stride. Just like me they are excited to see how it turned out or like me, they give a sigh and say, "Well, that's not what I expected.". 

Pottery is like that. You make something and it looks one way, then you have to glaze it and you are never sure how it will turn out. Most of the time you are pleasantly surprised... but you just never know.

Fixing an old house is like that.  When I first moved back here at age 24, my kitchen was still a 1960s kitchen. My parents had remodeled it to the times. The cast iron sink was replaced with a new metal York sink with overhead cupboard. Lots of drawers and shelves, something my mom had lived without for 30 years. They put white linoleum with green and brown speckles on the floor. In 1960, linoleum came in sheets about 6 foot wide, so there was a metal strip down the center of the 15x12 kitchen to hold two pieces of linoleum together.  My dad put it directly on top of the floorboards, so by 1978, the linoleum had wear spots corresponding to the uneven edges of the floor.  The woodwork was painted white, I counted 15 layers of paint, Walls had a once white speckled paper, but my dad was a smoker so it looked a little... smoky.  As soon as I moved back I removed the linoleum. My mom said I will get slivers from the wood boards. This was true for a while.

The boards are not original. Sometime around 1900, someone removed the 7 foot fireplace that stood out into the kitchen. The kitchen took up half the downstairs. The base of the chimney and the hearth stone where once inside the room. When they removed the chimney and fireplace, they covered the old wide oak planks with diagonal four inch tongue and groove pine planks. They nailed them in with many, many three inch nails.  I experimented taking off a couple in the corner and also where the hearth had been. If I remove the diagonal planks there will be many nail holes to fill in. But also, what is under the hearth and chimney is a mystery that I have hesitated to find out. I have been here 30 years and the diagonal floor is still there. Someday... I will remove it, but not today.

A good surprise was under the white 4"verticle wainscoting boards that ran around the base of the kitchen. Also put on with many large nails, were two 15 inch horizontal planks that ran along each wall. One small section has a 16" x 28" plank. If anyone knows about our trees today, planks do not come this wide. These came from massive oak trees.  You may look around all our woods today and think, "These are old trees", but not so.  Most of our old growth, primeval trees were cut down by 1900 to use for houses, barns, fences and firewood. The planked walls, newly uncovered, where still coated with a blue and then grey milk based paint. 

I scraped the woodwork and painted it all a sage green. It is on the east, south and west end of the house and is perfect for light. with four large drafty windows, the kitchen is filled with warm light.  I replaced the metal York sink and cupboard, with the 1930 cast iron sink, (my family does not throw things out, the cast iron sink my grampa had replaced the stone sink with in 1930 was in the cellar. The legs are still there.. I couldn't throw them out either!) This time the sink is back without the legs. A friend made a wood cupboard underneath and an old wood cupboard hangs above the cast iron.

The Kitchen 2010...still not done...
with Emily and Rusty dog

The ceiling. Sadly, my dad had knocked down the plaster ceiling, which from photos  I have, does not look too bad. But they wanted a modern house and put up white cardboard squares that had also turned dingy and ugly. Down they came one day with bushels of mouse droppings, nests, fibers, wood shavings and spiders. The exposed beams were not meant to be exposed. They are cross cut. 2 1/2" by 6 1/2" rough beams. The sub flooring above was also rough cut, so I dealt with falling splitters of old wood for the next 10 years while I debated what to do with it. 

The beams were unevenly spaced and rough cut. I could pay an exorbitant amount or get This Old House TV show to re lath and re plaster it like it should be. I could put up plaster board, but that would be uneven. I could put up wood strips and place plaster board between each row of beams. But they would be so irregular.  Finally, I saw a magazine with a planked 1800s ceiling. That was it. I could even do this myself. So now, I have white, five inch planks that look like they were always there. They are tongue and groove keep out the wood chips, mice and dust and I think it looks great.

But there are still wide oak planks hiding under the diagonal floor boards waiting to be exposed. Like a load of pots that you put in the kiln, will I be pleasantly surprised to open it all up or not?

Want me to send you an email notice of my next post?  Sign up right here:
Subscribe to I saved a homestead by Email

Sunday, May 22, 2011

Day 25... More About Flax and Linen Weave

I am now firing my special pot today! I took special care in drying it and now it is ready for its' first firing.

Yesterday, I went to a sheep and wool festival in Rhode Island.  Coggeshall farm, http://www.coggeshallfarm.org/ is a historic farm site/museum in Bristol RI.  The house there was built in 1790. Sheep, chickens, turkeys wandered around the lawns. The farm cats are friendly. Horses donkeys were there too. Outbuildings and sheds are accurate of the time period.

There was also a great reenactor/demonstrator there who was an accurate and funny guy that made learning about flax production so interesting. I watched it 3 times. 

Flax was grown all over New England till cotton was easier to process, (mass production in the early days). Mills and faster machinery, the demand for fabric and the cheap cotton from the south, eventually put flax production here out of business.  Most communities had someone who liked and was good at weaving.  Farmers grew acres of flax. Broadcasting the small seeds, weeding once they sprouted and the the plants grew think and dense, blocking out further weeds as the flax grew. Then there would be beautiful blue flowers. In the fall, flax was cut, soaked, dried, beaten, scutched and haked into 2-3 foot fibers that are then spun into an incredibly strong and durable fiber. Cotton-jean is a fabric woven of cotton weft and linen warp threads... (blue jeans c. 1700s). Wool and linen was turned into a strong and warm fabric called Linsey-woolsey. I just did a Google search and can find very few places that make Linsey-woolsey today and our modern bluejeans are cotton and sometimes hemp-cotton. These hemp based bluejeans come from the cannabis family of plants, but you can't go smoking your blue jeans... industrial hemp has very little THC levels.

The Birge family of farmers that owned my house grew, spun and wove linen into fabric. They wore linen clothes every day. One family in Maine had acquired a loom in 1786. Between 1787 and 1792, two girls of the family wove check, diaper, huckabak, worsted, dimity, woolen "shurting," towles, blankets, "rag coverlids," and lawn hankerchiefs as well as "plain cloth".  Simeon Birge (the guy who I think built my house), well, his mother lived across the street. During the Revolutionary War, she wove tent fabric along with all the other fabric the family needed for clothes. I just heard that most people had two sets of clothes. One for every day and one for Sunday go-to-meeting. I supposed they didn't wash their clothes too often... maybe while they slept they could hang them near the fireplace to dry?


"For the comfort of the militia, when they should go into the service, the assembly directed that each town whould provide one tent for every 1,000 pounds on the list, and Torrington standing 5,816 pound and.15 shillings, was required to provide five, if not six tents. Hence, Dea. John Cook, then town treasureer, paid one order to the widow Mary Birge, by the hand of her son John Birge,(Simeons brother who went off to war and fought at the battle of Cowpens), for tent cloth, amounting to five pounds and siz shillings, and also, paid Cart. John Storng, one of the selectmen, seven pounds and sixteen shillings lawful money, for tent cloth.".. History of Torrington CT by Samuel Orcutt.

"She, (Mary), is remembered as tall and slight in form with blue or gray eyes. She was totally blind for several years before her death".... Kelloggs in the Old World and the New, Volume 1, Timothy Hopkins. If she wove for years and the lighting was bad... night by candle, overcast days, dark winters, I suppose it would have been a strain on her eyes.


Not my reed, but this is what one looks like.
 I found two reeds in my attic. So yesterday at the fiber fest in Rhode Island, I asked a new acquaintance about the reeds in my attic. They are about 40" long, made of tiny reed strips with fiber cords holding the reeds together. There are scratched marks on the ends, maybe Roman numerals. I have not found out any more about these yet. I especially want to know how old they are. Having just spent three hours trying to find out about old looms with no success on the Internet, I am going to close out for today.

Tomorrow, if all went well in the world of the kiln, I should be ready to make a plaster cast of the special pot.


Want me to send you an email notice of my next post?  Sign up right here:
Subscribe to I saved a homestead by Email

Friday, May 20, 2011

Day 23... Bagged

Me with my head in a bag age 5 with Beagles
No firing the special pot today, have to pack for a trip to RI.

I have a fondness for beagles.  My dad had hunting beagles. I  think. That is what I remember.   It seems I have always had a bag on my head, following my own inner GPS. Like the modern GPS systems though, mine seems to steer me wrong sometimes.

There is a lot of things I have forgotten. Probably due to lead paint... was I one of those kids who chewed on wood work?  I got my start with clay, making mud pies in the greenhouse and modeling little figures with the clay putty my grampa used for glazing windows. I have read since that there was a good deal of lead in putty as in paint before 1970. 

So is my head feeling heavy from the 1,000 things on my mind or is it filled with lead?

Grampa was an old school florist. His father came from Bruschal Germany in 1881 to Brooklyn NY. Great grampa Karl and his sister came to American, part of the huddled Masses at Ellis Island looking for a better life and opportunity.  One of 8 children born in Germany, Karl was only 16 when he and his older sister Barbara, 21, boarded a ship, steerage class, and got their first glimpse of Lady Liberty in New York harbor.

I have photos of them in Brooklyn in their gardens and greenhouses. Today it is hard to believe that Brooklyn still had dirt roads and farms.  (My computer will not recognize my scanner, or the printer at the moment so I can't attach photos.) The greenhouse flower and vegetable business grew and they began to vacation in the country. They bought a house on Hayden Hill Road in Torrington, further up Torringford Street. Then my grampa Frank bought this house and 15 acres of farmland. He built his first greenhouse in 1935 I think.


Don't know this lady, but look at those beans!
I love being in a greenhouse. The moist heat, smell of dirt and plants, bugs crawling around. Good earth. Out of the earth comes miraculous flowers. Flowers from little tiny seeds, nurtured with water, grow into perfect flowers. Just look at a fresh flower as it buds and opens. What a miracle!  I have some magic beans growing in my jewel pots on the back porch right now. With the past 7 days of rain, they have sprouted and are now up and leafing out.  Each day for the past 2 weeks, I have checked them and now they are here!  Magic beans are sturdy, hardy, versatile plants. They grow from red, white and black speckled seeds about the size of large lima beans.  They have swollen under the earth and have good sturdy stocks.  They will grow 8' to 10' tall. They will be covered with perfect miracle bright red blossoms that last for weeks. The blossoms will turn into string beans up to 10" long! Really!  Although slightly fuzzy pods, they will taste great in salads and fried with onions and bacon (Emilie's favorite).  If you let some pods stay on the stalks till October, you can gather the red, white and black speckled beans and eat those in chili or save them for next year. Cycle of life again.
Scarlet Runner Beans!


Want me to send you an email notice of my next post?  Sign up right here:

Thursday, May 19, 2011

Day 22... Chickened out

I chickened out at firing the special pot today. The model is made of local red clay.  It will fire around 1800 degrees F, and still be porous.  Because of the iron in red clay, the particles of feldspar and other trace minerals will bond together at a lower temperature than earthenware, stoneware or porcelain. 

I did fire my small Alpine kiln, 1950ish version, with a load of glazed pots.  These pots have already been fired so there is no chance of steam exploding the pots. I usually just crank the switches to high after the kiln is warmed up to 400 degrees or so.  Then I shut the lid, stop the peep holes and wahla!

If I had put my unfired special pot in however, I would have had to heat the whole thing slowly and also risk the chance of a chip flying off or pot exploding. So I left it out.

Sometime in the early 1990s, I almost burned the barn down. Not because of the kiln failure this time. Some other day I will tell you how almost electrocuted myself plugging in an old ungrounded kiln. This day, my sister and I had decided to try waxing the bottoms of our pots to save us a step in cleaning them. We were new potters, just out on our own in the pottery world. Like most things I try, I just jump in and see what works. I put a pot of paraffin on an electric  hotplate to melt the wax. Then we noticed it was lunchtime and went in the house for food and tea. Soon, there were young workman at our door telling us to call the fire department.  The year before, a developer had started grinding up our woods full of laurel and blueberries and had left them in a large, house size pile of chips 30 feet from my barn window where I was working wedging up clay.  Now the chips were gone, and there was to be a 2 story house where my grampa grew corn and potatoes. Sad, and yet these workers saved my barn! 


Here is me inside the barn at age 5

Our outside water hose, now that the greenhouses with all of those hoses were gone, consisted of one spiket on the far end of the house about 100 feet from the barn.  The young fellows brought buckets of water from the bathtub in the house, and our brave and fearless volunteer fire department got here in record breaking time, the firehouse being right across from Walmart 1/2 mile up the road. Quickly they actually covered my kilns and some pottery, broke in the back loft window and hosed down the whole loft soon having the fire out.  The wax had caught on fire, ran up the back wall melting my radio and scorched the peak of the barn.

The beams in the barn, being 200 years old, are 8-10 inch pegged chestnut. The siding in the back near the roof still has black streaks and charred holes, but the beams and roof held up well, with a new nice black tint to them too.

Needless to say, that was my last wax experience. Sometimes old methods like wiping the glaze off the bottom of the pot with a wet sponge is.. more sensible and a time saver in the long run.


Grampa with chicken coops and calf 1940ish

And we did have chickens. Grampa was fond of eggs
and chicken soup. These chicken coops were right behind the
greenhouses and next to the road. A neighbors driveway now runs through the middle of it, but when I was a kid there was an old car seat over on the right. My brother and I would jump off the roof and bounce on it. The tall tree behind was a tulip tree next to the stone wall.  It was cut down to put in the houses and the stone wall disappeared too. On the right is one of our fields. It being only about 4 acres, we cut it with a push behind tractor and stacked the hay in our pickup truck to be carted off. By the time I was in this picture, the cows and chickens were gone and we had taken to raising rabbits, so we did not need the hay.

Want me to send you an email notice of my next post?  Sign up right here:
Subscribe to I saved a homestead by Email

Wednesday, May 18, 2011

Day 21... The Cemetery under Petco

Tomorrow, my special pot goes in the kiln for the first firing. If all goes well, I can make a cast of it next week. I have been teaching classes, throwing pots to sell this summer and working on my weaving. 


This weeks knitting group, where very little actual knitting gets done, what with all the quilting, sewing and weaving going on, friends brought up the subject of our Walmart shopping center across the street, over the river (well, brook) and through the woods in front of my house and the cemetery that used to be there. The top of that hill is the main intersection of the old highway running through Wolcottville (now Torrington) in the west and Bakerville (or is it Bakersville?) in the east. The north and south highway, Torringford Street, actually ran through the center of the village past the schools, church, blacksmith, taverns, stores and cemetery.   

On the the four corners of the intersection were: Griswolds Tavern, a brick farmhouse like mine, a school and the Bissell homestead. Benjamin Bissell came to Torringford in 1748 making a total of 7 settlers in town.

When I was small, indeed until Walmart was built a few years ago, there was a small family cemetery under the area that is now Petco.


The Bissell monument at the Torringford Cemetery
The tall spire of an 1800s monument rose high above the pastures on Torringford Street. The stone marks only six Bissells buried there, but there may have been more graves on that spot. I knew the families on that property, descendants of Benjamin, but do not remember what the cemetery looked like other than the tall monument.  Benjamins house had already been torn down years before the property was bought for a shopping center. There were a house that contained a post office, another house of the same era, around 1900?, a package store and a 1960s house that were all torn down for parking spaces. Along the road was an area that the family would flood in the winter and we kids would go up there to skate, the area now under McDonalds.  There are still a few apple trees and run away flowers from gardens off into the woods east of the shopping center. 

 Much of the good farm topsoil was removed from the hill around the cemetery and sold off at the time of development. The cemetery was supposedly moved to the Torringford cemetery about  1/2 mile up the road behind the new solar United Congregational Church. 

I met one of the men who helped move the cemetery not too long ago and he said there was not much remaining in the ground under the monument but a bit of wood from the caskets, which were moved to the old cemetery.  How much remained, how much were moved and how much was scattered around the area? There are bones of people and animals that make up the soil of these old farm communities. And there may still be fragments under the new shopping mall.


Birge family graves just to the left of the Bissell monument
 
My grampa had a retired race horse when he first moved here in 1927.  I don't remember the horses name or anything else about him other than he is buried out back near the stone wall. Which is now someones back yard. Bulldozers must have moved bone remains and scattered the fragments.  I have found horse or cow teeth in jawbones in my vegetable garden. The circle of life. The land around a farm as old as this one, over 200 years, must have a few cow and horse bones as part of the soil. But there are no human bones that I know of in my yard. The Birges are all buried in the Torringford cemetery up the road behind the Church.


Want me to send you an email notice of my next post?  Sign up right here:
Subscribe to I saved a homestead by Email

Monday, May 16, 2011

Day 19.... Weaving a Tale

Ceramic Sheep
I have missed 3 days!  My special pot is still drying. Hope to fire it this week.  Time is tight. I have orders to fill,  pots to pack, kilns to repair, events to schedule, friends to talk to, gardens to plant and weed, grandchildren to play with, classes to teach and weaving to do.

After the end of the past few days, I have been working on my tape loom project.  I am off to a Fiber Festival this weekend to try and sell some ceramic sheep, pottery cups with sheep, angora rabbits and llamas on them, mini pots with sheep, angora rabbits and llamas on them and tape looms.

When I moved back to this house at age 24, I found an old paddle style tape loom in the attic. My attic smells of old wood, mice and dust. It is really nice place to visit on a rainy day. There are things here that have been here for over 150 years.  A spinning wheel, loom reeds, parts of chests and bed frames, house parts and a few books from the original family.  A wicker sewing basket, Ladies Home Journals, National Geographic, sheet music, a dressmakers dummy and toys from my grandparents. More books, toys, baskets, records and furniture from my parents. Toys, keepsakes, albums, dollhouses, artwork and more books from my generation. Stuffed animals dolls, lamps, games and puzzles from my children. Christmas ornaments are there too. It is quite full.


This paddle loom is very primitive.  Tape looms were very popular up to the mid 1800s here in New England as well as many countries in Europe.  Before the days of zippers, Velcro and snaps, everyone used narrow tapes to bind off edges on skirts, aprons and hats. Ties for the hats aprons and pants were needed to. Cotton, linen and wool bags were used for carrying and storing. These all needed a band of cloth that was stronger than strips of fabric and more supple than twine, rope or string. And bands were often colorful and decorative.  Girls and women would take the lightweight, portable looms to their friends houses to sit around and weave and talk like knitting that has become so popular lately. No TV or radio back then for entertainment.

Any person could weave a plain weave tape, about 1 yard an hour, and come home with yards of tape wound into balls of pretty and useful bands to be on hand when needed. Around here, wool and linen tapes were made, till cotton became cheaper in the mid 1800s.


The Old Attic Loom

When I first found this loom 20 years ago or so, I didn't know how to use it. I found information in a Yankee magazine around 1980, so I knew what it was. The old one is very warped. So I made a crude copy with my jig saw and a drill and a 12"x 30" pine plank from that chain of stores just before Home Depot took over our town.  Before the Internet, I could find no one who would tell me how it was warped and how to work it.  I first tried placing it between my knees (that was right) and moving my knees up and down to open the sheds (that was wrong).  Eventually someone suggested just moving the shed with my left hand up, pass the shuttle, down, pass the shuttle. This worked fine. Soon I was weaving bands for... no real purpose just because they are pretty and I wanted to know how it worked. I did find uses for the bands. I go to Reenactments, where silly people dress up in old style outfits and live in canvas tents, cook out of cast iron pots on campfires, play banjos and fiddles and generally have a good time meeting interesting people. I use my bands for hat strings, apron strings, bag straps and shoe laces. I can make cording (just keep passing the weft from the right to the left, not back and forth and you get a round tape!) Cording for lacing fronts of jackets, bags and pockets.

Pockets were separate pockets that tied around your waist under your skirt. A side of your skirt was left with an opening so you could reach your hand in for your handkerchief, smelling salts or pocket coin.


A Reenactors jacket with cording
  All this dressing up is great fun.


My boyfriend, Hello Roger!, has Norwegian and New England roots and either he or I mentioned a strap that could be made for his banjo. I had purchased a book called Band at an on line book store. The description said, " how to make tape loom bands with color illustrations".  I was surprised to find out it is all in Swedish, but still it is a wonderful book and the illustrations are gorgeous.


Not My Tapes

A tape loom is a single, ridged heddle loom. Even so, you can make an infinite variety of tapes with color, stripes, checks and diamonds.  However, the Norwegians, Swedes, Russians, Spanish, German and Africans figured out how to make elaborate patterns by manipulating the threads by hand or with a flat stick.

I have been thinking and trying to figure this out. I want Roger to have a pretty, Norwegian style banjo strap!  By brain will just not wrap around it, I need someone to show me before my head bursts. I know once I see it, it will all make sense. My friend Jolene, is trying to learn Nalbinding. But that's another story.


Tomorrow.. What happened to Grampas dead horse and where did our cemetery go?

In the meantime, my special project is going out to the barn to get its first firing.


some of my tapes

How it is done


Want me to send you an email notice of my next post?  Sign up right here:
Subscribe to I saved a homestead by Email

Wednesday, May 11, 2011

Day 15... Slip Ware and Red Clay Houses

Well, my special project is dry. Next week I will fire the original model and cast it in plaster.  Making a mold will allow me to make lots of these special pots, and they will all look almost alike. I will be doing some hand painting on them to make each one individual. 


Early New England Pottery
 In the meantime, I am making another new piece. Piece's actually. I have been making slip trailing red ware of my own patterns for a while now.  In early Connecticut, potters made red ware like they did at home in England.  English red ware were simple forms with brown, yellow, green and black glazes. A splash of color here and there was all they needed.

In Northwest Connecticut and along the western Connecticut shore, potters were influenced by the Dutch and German potters along the Hudson river and Pennsylvania. 


Pie plate by Hervey Brooks


These potters used slip trailing to make bright patterns on their pots.  Hervey Brooks, who I mentioned the other day, lived in Goshen. He made bake ware and dinner dishes... not dinner sets... country folks used common red clay dishes like porringers (soup mugs), water pitchers, chargers (plates), mugs, steins, pie plates, milk pans, pudding bakers, etc.

Pennsylvania potters were more elaborate. They used a technique called sgraffito. A red ware item was coated with white or yellow clay, dried and a pattern was scratched into the surface.  They also made some slip trailing that looked like cake decorating today.

my versions of sgraffito and slip trailing


Which leads me to today's project. My new slip trays.

In Torringford, the clapboard salt-box style houses were the usual style of building in 1785.  Most settlers had come here and build simple log cabins while the new house was being built. There were huge old growth trees back then, plenty of wood to build big roomy houses that were the going style.  A house 30'x40' with two stories was not uncommon. Large windows were on every side. One to four brick chimneys and plenty of attic space.  An ell was soon added for even more space. 

By the time the original house here had burned down, it was replaced by "new" style brick house, a standard 20'x30' two story house, one of six brick houses built in Torringford in the early 1800s.  All are still standing, some painted white, and one is now sporting vinyl or aluminum siding. 

When Nataniel Birge married Olive Peck and moved into the new brick house on this spot, I am sure he was proud of his sturdy, hansom dwelling.  Nathaniel and Olive had three children here, all girls.  Janette married and moved nearby, Maryette died here at age 19 from "congestion of the brain", and Martha the youngest, out lived her parents here till she died in 1901.

I assume they ate porridge from red ware porringers, poured fresh milk from red ware pitchures and baked eggy puddings in red ware bakers.  The big kitchen fireplace with beehive oven is gone now but the outline can be seen outside on the back wall.

These are my newest slip decorated pieces which will be brighter when glazed and have magnets glued on the back so we can hold photos and little Freddy's drawings on the fridge.

Till next time when I will blend the past with today and pottery...
Want me to send you an email notice of my next post?  Sign up right here:
Subscribe to I saved a homestead by Email

Monday, May 9, 2011

Day 13... A day in the life of a potter.

I had a terrible day playing with casting plaster today!  Not sure what could have gone wrong. The plaster sitting in an old barn all winter in a metal garbage could have gotten damp. The bisque clay model could have been too porous. The Murphy's Oil Soap I coated the piece with so plaster wound not stick to the model.. perhaps that was too sticky. The mold came out flakey and marred on the inside. So I have scrubbed the bisque piece clean and after drying in the kitchen oven tonight, I will try spraying it with shellac tomorrow, and try again.

So many things can go wrong with pottery. Its not like you make a painting and its done, or weave a  rug and you can see what you have, the  piece is in front of your eyes the whole time. With pottery; clay, glazes, kilns, temperature, humidity, viscosity... so many variables and chances for something to go amis.  And you are never aware of whats going wrong till it's too late.

Early in the year 1803, Simeon Birge and his family of 10 children and another child on the way, lived in 1200 sq feet of space that I now call home.  One of his brother, Issac, a mute, had already died at the young age of 29.  Another brother died as a result of injuries in the Revolutionary war at age 17. His older sister had 13 childen, 8 died all under 6 years old. On a happy note, his sister Anna had 9 children, all lived and she ended up with 50 grandchildren!

In 1803, Simeon lost his oldest daughter at 17 years along with the new baby girl that year. Childhood deaths were common. So many things could go amis. Food, injuries that would not heal, illness and accidents. Of the 8 surviving children, 5 moved "west" to Missouri and Illinois. In the 1830s, wagon trains of people looking for new lands rolled past the Litchfield CT green.

I believe that sometime around 1818, the original clapboard house on this site burned down. I like the idea of Historical fiction. I found a survey map at our townhall that had a house and the barns here in 1785. However, this brick, Adams style house was build around 1820 judging by the woodwork, nails and cut of the beams. Most. Some of the beams are older. It really looks like the family got together and build a new house out of some of the old wood and pieces.  There are beams in the attic with burn marks, but not burn marks together. Like they were taken from a house that had partcially burned down.
No one kept a journal or if they did it has been lost. So we know little of what they did every day.

That's the trouble with history. Very little was actually recorded. People were born, lived and died without writing down what they did every day.  Our local potter from Goshen, Hervey Brooks, is famous because he kept wonderful journals about the pots he made and all the other side jobs he did on his farm in Goshen. He was not the first potter in our area, but because he wrote things down and his family kept them, we now know much about the life of a potter in the early 1800s. His barn is at Sturbridge Village in MA and his journals keep his craft alive.

Today was a day for playing with the grandchildren, so not much got done in the pottery barn. But tomorrow, I have to cast more molds,  pour molds, roll out some redware trays, throw some pots to fill orders, decorate the trays I made that morning, open the molds I poured that morning, clean and check the kiln for bad wires, paint the small shelves with kiln wash after glaze ran onto them last week, set up a new wheel for a new student and then teach a class.

I don't usually keep a log of what I do everyday like Hervey Brooks. Perhaps I should. Perhaps we all should.

Friday, May 6, 2011

Day 10.... Face Jugs and Other Appliances

My special piece of pottery is almost dry.


One of my Jugs
 A friend dropped by yesterday and bought some pottery birds for her garden. She also ordered a face jug.  Face Jugs have always been a favorite with folk potters.  The Egyptians made faces on jugs... most cultures have. The history of face jugs in the USA goes back to our beginnings.

Just google "face jug" images and you will find hundreds of photos of old and new jugs from around the world. Some are scary, some are funny.  It's a lot like playing with Mr. Potato Head. You just put in some eyes, a nose, a mouth, teeth, ears, squish and move them around its a great pass time. You usually don't know what you will turn up with till it's done and the expression comes out.

Bennington Potters in Vermont made Toby face jugs and mugs early on. This type of pottery was brought over from England even earlier. Slaves in the south made face jugs, perhaps as effigies of loved ones or ideas passed down from the pottery their ancestors had fashioned in Africa.

Like many old traditional crafts, ideas were passed on, embellished and adapted to the individual crafter.

In the 1800s, the people living in this house were crafters and tradesmen by circumstance.  I have found loom beaters, a spinning wheel and a tape loom in my attic. The women made cloth from the flax and wool grown on this property and neighboring fields.   The tradition of spinning and weaving still continue today.

"The things which men have made... are inevitably the best witness. They cannot lie, and what they say is of supreme importance. For they speak of man's soul and they show who are his gods... Eric Gill

And so I continue to hang onto the simpler way of life. I like electricity and indoor plumbing, but sometimes all these modern gadget's we are bombarded with do not make our lives simpler. New computers and electronics break and cannot be fixed by the common man or need upgrades. Cell phones mean you can talk to everybody all the time.. I can't be interrupted while I am potting and weaving by talking on the phone all day. And how many outlets for appliances to make life easier do you have? I have 4 individual ones in each room. That means I can have a refrig, toaster, coffeepot and my daughters microwave in my kitchen... and that's all!  With no cupboard space in this old house because of all the windows, where the heck would I store food choppers, ice cream makers, juicers, bread machines, carving knives and blenders?

"Mention also must be made of those who, sometimes, against their wishes, I suspect, have kept aloof from the tendency toward modernity; who cook at old fashioned fires, old fashioned dishes and spread them upon old fashioned tables; who, mow with old fashioned scythe snaths and cart hay on old fashioned ox carts into old fashioned barns; who wear old fashioned clothes in old fashioned kitchens and eat apples grown on old fashioned trees."    --Charles D. Hubbard

Till next time...

Want me to send you an email notice of my next post?  Sign up right here:
Subscribe to I saved a homestead by Email

Thursday, May 5, 2011

Day 9... Heating up the Pot...


My Special Piece of Pottery that I am making in order to sell enough to save my house from the tax man is slowly drying enough so I can fire it up.

I sometimes wish pottery was an immediate gratification thing to do. It is not.  No matter what you make from clay, the piece will be brittle when dry. Leaving it on the back porch table, as I did with some bird castings one day, the clay turns into a lump of mud again, as did my bird castings that I left out on the back porch that day. 

Once it is thoroughly dried, it has to be heated in a kiln for hours. Clay absorbs moisture from the air so even if it looks dry, it will still have moisture in between particles of clay.  Clay particles are like little chocolate jimmies. At the microscopic level, these little bars of feldspar when dampened, will slide together and line up in a dense clump, which is why clay holds together as it does unlike other dirt and rock particles that are round and crumble apart easily.  I usually give my pots 3 weeks to dry, although they can be rushed to dry quicker by placing them in the sun or on a heater or sometimes in my kitchen oven once they look dry. If they dry too fast, however, they could crack in the bottom, so i have to be careful.

The kiln must be heated slowly, therefore, to evaporate the moisture. If heated up to fast, steam will explode the pots causing damage to other pots and a general mess in the kiln.  I was gratefully given an old, 1950s or 1960s model of a small electric kiln that had been directly wired into a school art room. After installing a new plug and finding elements to fit (elements are those heating coils), I turned it on, stood back and prayed it would work. Sure enough, the elements worked fine. So I loaded my first pots, propped open the lid open and waited an hour and a half before I could shut the lid and turn up the heat. Soon there was a BANG! Apparently, the bottom element switch was stuck on high and the pots heated up way to fast. Looking for a replacement switch seemed impossible, so I took apart the switch and cleaned up the connections and do-hickey's inside. Still stuck on high. Only now I leave the whole lid up for a couple of hours and no more pots have exploded.

Once pots are fired, taking at least 6 hours, usually a lot more depending on the temperature you want to achieve, the kiln now being 2,000 degrees takes another 6 hours or more to cool off.  These bisqued pots are usually glazed and refired taking another day.

So today I am patiently waiting for my special pot to dry. I must keep busy doing other things. I am a master in multi-tasking.

I moved back to grampas house in 1978. For the past 33 years, I have been multitasking a lot. Ripping out the remodeling done by my parents and grandparents in the house, the linoleum exposed nice wood planks, vertical kitchen planks exposed 18" horizontal plank wainscoting. I stripped floors of paint I scraped, stenciled and repainted walls and woodwork. I plastered ceilings too.

I have worked with plaster on my pottery molds.  The plaster in this old house has fibers of flax and horse hair embedded in it to help hold it together.  On the outer walls, two courses of brick are covered inside with 1" vertical planks about 12" wide.  Onto the planks, accordion style slats are stretched to hold the plaster. There is nowhere to put insulation in the wall cavities. Outlets have been put on the inner walls or into the floor boards.  The four upstairs rooms are pretty much original. Downstairs, my parents gratefully put in a bathroom in part of the kitchen where the stone sink used to be.  A small bedroom and a pantry was made into a dining room. The 7 foot kitchen fireplace was removed around 1900. The hearth and chimney were inside the house taking up a good deal of the kitchen. The mantel still hangs over the new gas stove and cast iron sink.  Sun shines in through 23 large drafty windows. It's a nice place to live.


The Kitchen today


Still waiting for the special object ot dry! Thanks again to all of you ordering and buying my pots! My pots are not just pretty, they can go in the oven, dishwasher and microwave!

Want me to send you an email notice of my next post?  Sign up right here:
Subscribe to I saved a homestead by Email

Wednesday, May 4, 2011

Day 8... Plaster Casting and The Barn

My "special pottery piece" is drying... slowing.. so it won' warp or crack. 
I plan to cast the piece in red clay, like the red clay my house is made of. Making a casting mold can be a long process. I usually make the original model 1/2" to 1" larger than the finished size of the piece. The original finished model is dried slowly and bisque fired.  This finished unglazed piece is given three or four coats of Murphy's Oil Soap.  Glaze would have filled in any details on the model. The soap soaks in and seals the surface without taking away any fine details. The soap also as a release. Plaster will not stick to the soaped model when I get to that stage. 

When casting with plaster, I must be sure te here are no traps or undercuts on the surface that will hinder the removal of the hard plaster later on. I use a marker to place divide lines where the seams will be on the model.  I roll out a piece of fine smooth clay and cut it into a presisely measured retangular shape an inch larger on all sides of the object. I lay the object on the center of this piece and start building my dams. I fill the base retangle of clay up to the lines I had marked on the model.  I use plexiglass frames to form a box around the model and dams at least 1" higher than the model. I check for any traps and fill those up with soft clay. I  seal the outer edges of the clay dams to the plexigass and also the verticle edges of the plexiglass walls. The plexiglass is firmly attached to the table with balls of clay on the outside and clips and heavy rubber bands around the outside walls.


Now I mix my plaster. You can use Plaster of Paris from the store, but it is cheaper and the plaster makes a better cast to buy #1 Pottery Plaster in 50# bags. I mix 1 cup of warm water to 2 cups of plaster. I mix it by hand, making sure lumps are dispersed.  Then I slowly fill in the cavity I had created above the model. Plaster sets up quickly and a few taps to the table will disperse any small bubbles. This will set in less than 1/2 hour. I gently remove the plexiglass, clay dams and finally the model itself.  I smooth the outer edges with a knife and check for any surface damage. If all is well, I make notches on two sides to be used as  "keys" so the pieces will fit into place like a puzzle. I replace the model to its new plaster form, and repeat the process for the other side of the mold.

Models are designed to have as few pieces as possible. A two piece mold is preferable, but my cow for the butter crock turned out to have 4 pieces because of the shape of the cows head.  Each plaster cast must have more Murphys oil soap applied to the outer mold surface only. Never put soap on the model image as this will not absorb the casting clay later on. 

When all the sides of the mold have been made, the original model is placed inside with all plaster pieces attached and a rubber band holds the hold mass together to dry. The mold must be completely dry before the casting can start.


Casting can be done with liquid clay. The trick is to have as little water as possible added to the clay so it will pour like cream. If there is too much water, the cast may never set up.  To make this possible, I put sodium silicate and soda ash into a bucket of dry clay scraps that have been soaked in water over night with just enough water to cover the scraps.  I have a large mixer to mix up 5 gallons quickly and smoothly.

In 1648, a man named Gauber made fluid silica by melting silica and potash. Plastic clay can vary from between 70% to 80% mass (weight)of clay  with the balance water. But this represents a volumetric ratio of about 50% to 70% water with the balance clay,  So the clay should fall apart and become totally fluid. It can be encouraged to do this with substances such as sodium silicate in a process called deflocculation. The sodium silicate coats each particle of clay and water can flow more freely in between. 


When the plaster mold is dry, the model is removed, rubber band put back around the mold to hold pieces together and casting clay or slip is poured into a top hole of the mold. The water in the clay is absorbed into the plaster and a thicker layer of clay will build up on the plaster walls. I keep an eye on the mold, till the thickness of the wall around the edge is about 1/4 inch thick.  Then the clay in the center of the mold which is still liquid is poured out . The mold is set aside over nite and the next day, the mold is opened. I trim the bottom or opening and dry the whole piece. Later, the seams will be scraped off with a knife and smoothed with a wet sponge. Finally, I am ready to fire the hollow piece. Each time a piece is fired, the particles of clay are melted together and the piece shrinks in size.

You can see it takes a long time before you can get a finished mold. Once the mold is made however, I can cast over 50 pieces before the mold starts to deteriorate. The salts in the clay will eventually cause pits in the plaster, and details will begin to fade. At that point, I will make a new mold by putting the original model back in place and recasting each piece in turn.
1959

It's nice to have a big old barn to cast and turn my pots in.  When grampa bought the property in 1927, the big old barn was larger, had verticle grey planks, a dirt floor and cow stantions. When my parents married and moved back here when I was 4, he and grampa did some renovations so he would have a place to repair cars.  Stantions and hay lofts removed, a rotting addition taken down, siding replaced with "decorative siding", two garage doors installed, cement poured for a floor. My little sister was a toddler and her foot prints are in the cement on the eastern wall.  By this time the cows and chickens were long gone, grampa was getting older, my dad needed a place to work and the barn was in disrepair. The hugh beams are still inside. Chestnut beams are attached with the wooden pegs.  My dad put in a furnace.  And now there is a piano wall.

I decided to learn to play a piano. My mom found someone to give me lessons and we bought a used player pianowith dozens of piano rolls. Grampa said he did not want a piano in the house because of the weak floors, (these floors are solid oak with trees and six and eight inch beams holding it up... I think he didn't want to hear me banging on that piano!). So we put the piano in the barn. My ambition to play did not last more than a few months, I am not musically inclined, but we used the piano rolls at the many cookouts we had in the back yard. Friends and relatives would come over and we played baseball, chrocet and horse shoes, ate lots of salads, burgers, hot dogs and drank beer, lemonade and Kool-aid. The garage doors were opened and we took turns playing the piano rolls and sing along to "The sidewalks of New York". It was great.

My parents and we three kids moved away for 10 years. The picnics were over, the barn without heat, and the piano sucummed to damp and cold. By the time I moved back in 1978, the piano was ruined. To make room for the pottery equipment, I took a hammer to it one day.  All but the thick back wall of the piano went in the garbage. The piano back with all its strings exposed is now set into the wall above my sisters footprints. Its a great conversation piece and kids love to pound on the strings.
Today

Now the barn has a different use. Adults and children stop by to make and buy pottery and wander through the barn marveling at the big beams and the piano wall.

Till next time... and more news on my special project item! Thanks for all those who are reading my ramblings and have sent me comments via email or on the phone, and all who have purchased pots for Mother's Day!


Want me to send you an email notice of my next post?  Sign up right here: